
By Laila O'Boyle
There is so much confusing information floating around about how to maintain a sourdough starter. I see content creators who are sourdough experts directly contradicting each other and confusing people even more! While I don’t claim to know everything, I want to share what I have learned personally in the last 6+ years of baking naturally leavened bread.
Here’s what I know: as long as there is some activity and no mold, your starter is alive and can be revived and balanced. There is no one-size-fits-all method. What matters is finding the routine that fits your life and doing your best to stick to it. Starters LOVE consistency. Whether that means you maintain it on the counter or keep it mostly in the fridge, what matters most is that you’re consistent. In my opinion, the worst thing you can do for your starter is to feed it low ratios (1:1:1) and then leave it on the counter past peak, getting more acidic while the yeast dies off without access to fresh food (more flour).
Below are three approaches: daily feeding on the counter, weekly fridge maintenance, and how to reset a starter that’s gone too acidic. Remember that you can always switch it up. You can change what flour you feed it or whether you keep it on the counter or in the fridge. Just don’t mess with it too much, because then you’ll lose track of what you’re doing and how your starter behaves, and that’s when things go off the rails!
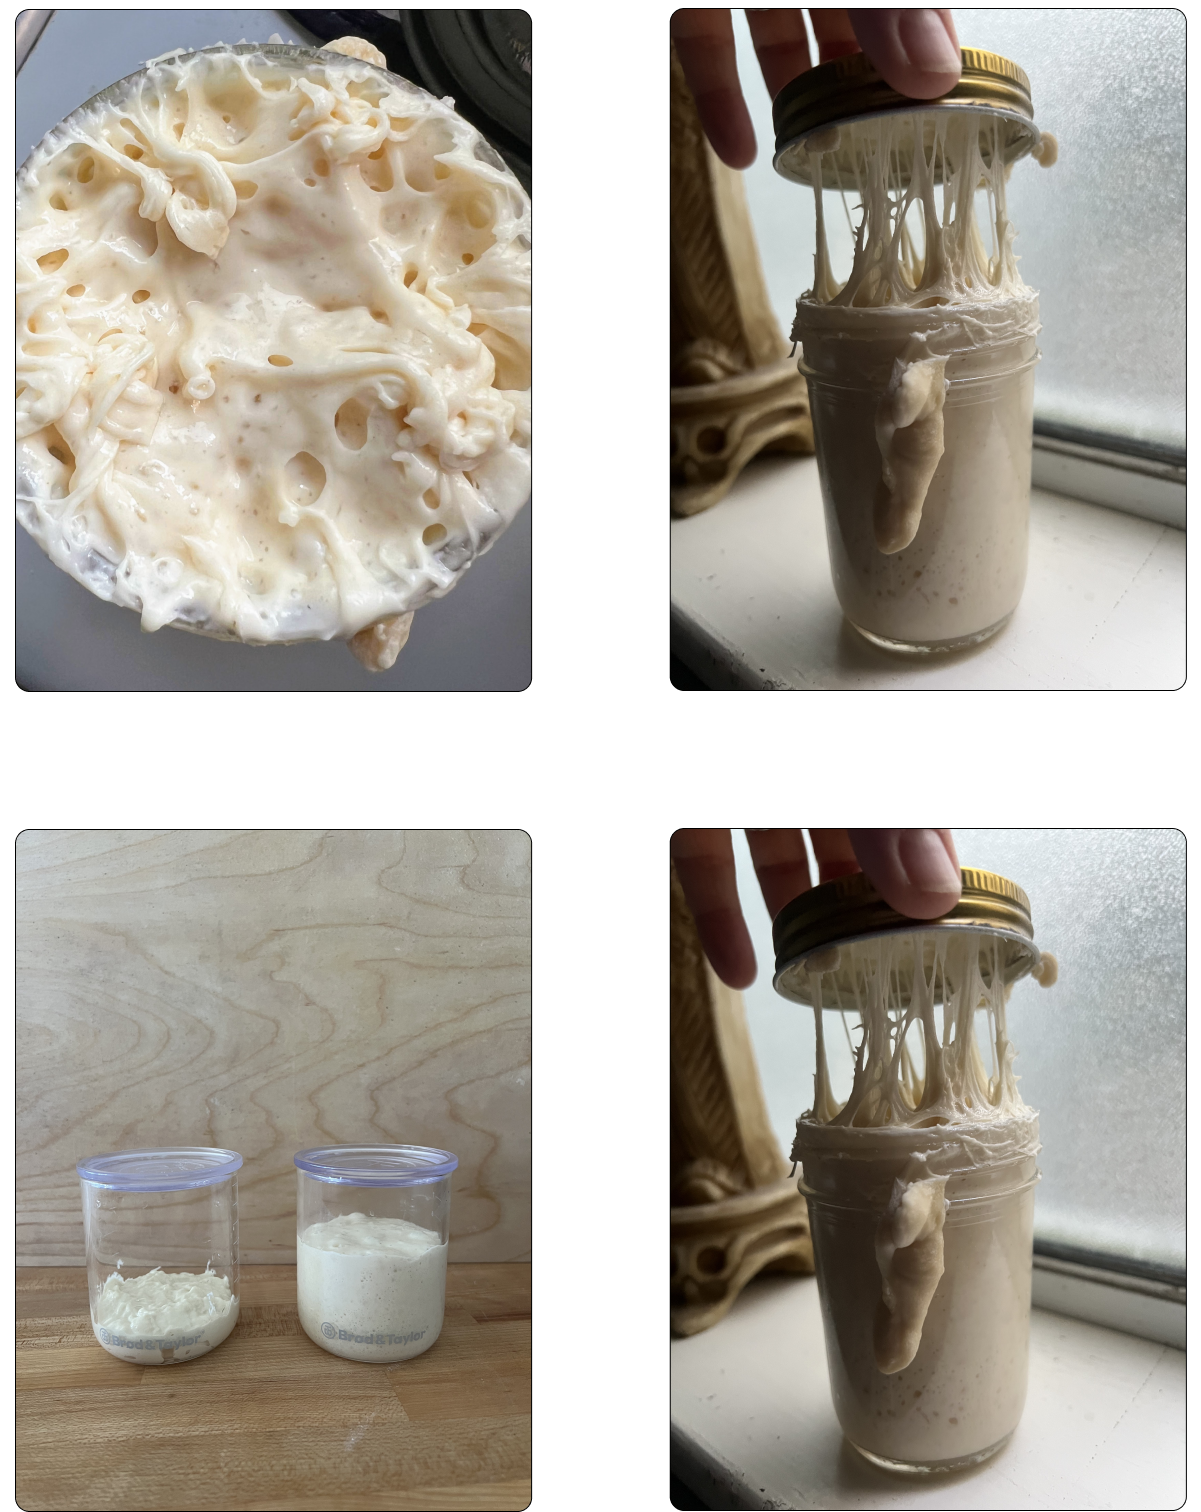
Regardless of your method, keep your starter jar tiny. And don’t just keep that small amount in a large jar. It is extremely helpful to trick your brain into small feeds by keeping your starter in a small jar. The second I switch to a larger jar, I tend to feed it too much and end up with a jar of active and beautiful starter challenging me to bake with it, even when I don’t have time to bake that day! I suggest you keep under 30 grams at all times. There is no reason to maintain a large starter between bakes. A small, consistently refreshed culture is more vigorous, produces far less waste, and is easier to keep in balance. Think of the jar not as a stockpile, but as a seed. 30 grams of starter can become 3,000 grams in 10 hours!
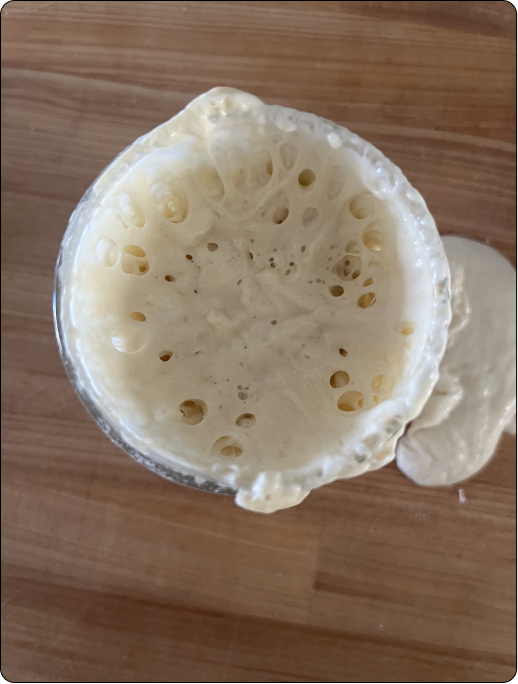
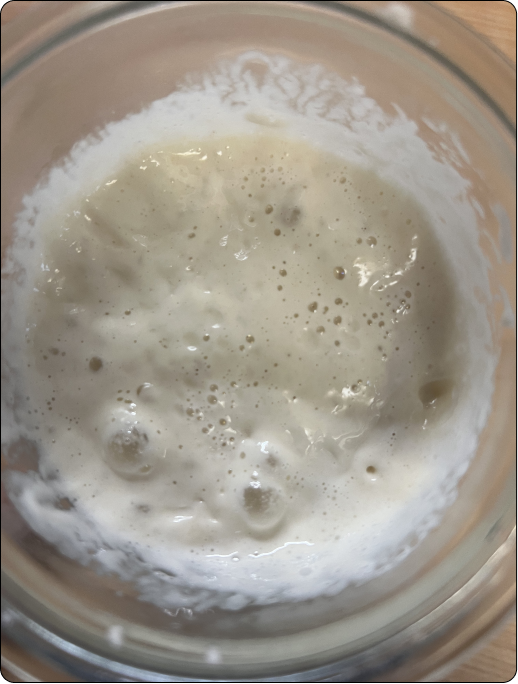
My tiny starter method: feed just 2–3 grams of starter with 10 grams of water and 15 grams of flour. That’s it. Small, manageable, and it works beautifully. In my bakery space it never gets above 70°F, and even that is on a warm day. That means I can easily refresh (by refresh I mean doing the feed described above) once every 24 hours. But if you live somewhere warmer, you may need to do this twice a day. You have to learn your starter’s patterns and try to catch it as close to peak as possible.(REFERENCE ABOVE PICS)
Before we move on to different methods, for this article and simplicity’s sake, we are using white flour for feeds and measuring by weight. If you are confused by what ratios mean, here’s a little breakdown:
Counter starters are for bakers who bake often, meaning multiple times a week or every day. Your starter lives at room temperature, fed once or twice daily, and stays strong, balanced, and ready to go without any warming-up time.
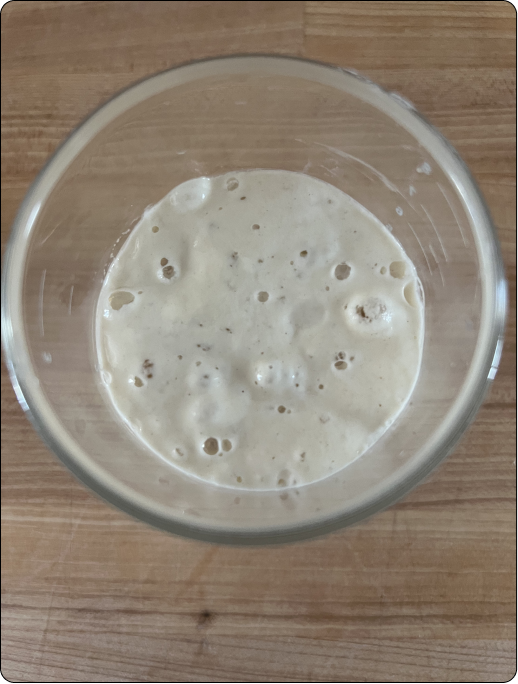
A healthy counter starter should more than double after each feeding. It smells clean, creamy, and lightly tangy. Smell is a great way to gauge your starter’s health. It should not smell sharp or like acetone. That balance comes from the relationship between yeast and lactic acid bacteria (LAB). When your starter is warm and well-fed, it favors lactic acid production, which is the mild, yogurty sourness. When it’s stressed, starved, or cold, it shifts toward acetic acid, which gives you that sharp vinegary smell and the sluggish, soupy dough so many bakers struggle with.
The most important factor: temperature.
Temperature drives fermentation speed, and fermentation speed determines how often your starter needs to eat. While you don’t have to become obsessive about it (I certainly don’t feed my starter at the same exact time every day; I have 3 kids and 15 things on my to-do list on any given day), it’s best to try to catch your starter well before it fully deflates and becomes very loose and liquid. When you see soap bubbles on the surface of your starter, that’s how you know it needs to be refreshed (fed!). It’s also really important to recognize that most kitchens range from 68–75°F in temperature, and some people live in tropical climates. If you live somewhere that’s almost always warm, you live in tanks and shorts and don’t even own sweaters, I’d skip to the second method and keep your starter in the fridge most of the time. When it’s above 80°F all the time, you’ll be constantly feeding your starter and it’ll get acidic SO quickly.
Warm kitchen (75°F and above): Your starter will peak in roughly 6–8 hours after a feeding, even at higher ratios, because the warmer the starter, the faster the yeast ferments. At this pace, a once-a-day feed isn’t enough. Your starter will peak, fall, and sit in an acidic state before you get back to it. Feed twice a day, roughly every 12 hours, at a 1:3:3 ratio (by weight!).
Cooler kitchen (65–70°F): Fermentation slows significantly. A single once-a-day feed at 1:1:1 is often enough, with the starter peaking somewhere in that 18–24 hour window. If you find that your starter is peaking and falling in that time frame, or even if it isn’t falling but is showing signs of being too acidic, increase the ratio or try feeding twice a day.
I don’t expect every casual baker to keep a kitchen thermometer, so if you’re not sure what temperature your kitchen tends to be, start with once a day and watch. If your starter is peaking, falling, and smelling sharp well before the 24-hour mark, it needs a second feeding. If it hasn’t fully peaked by the time you’re ready to feed again, your kitchen is running cool. In my experience, most kitchen temperatures require twice-a-day feeding for a truly well-balanced and happy starter. If this all seems like too much, read the next section.
The fridge is the right home for bakers who bake once a week or less. Cold temperatures slow fermentation dramatically, giving you the freedom to leave your starter for days at a time without it going hungry.
Fridge starters are lower maintenance and use far less flour. The trade-off: the cold environment does favor acetic acid bacteria over yeast, which means fridge starters lean more bacterial and need a proper wake-up before they’re ready to bake with. They are not as immediately strong as a counter starter, and they require a bit more planning ahead of baking day. Another thing to know is that some people claim a starter that is put in the fridge is never the same. Please read the bonus content of this article to hear my thoughts on that and what I’ve researched.
Weekly maintenance feed: Once a week, whether you’re baking or not, pull your starter out. Discard down to 5–10 grams, feed at 1:1:1, let it sit at room temperature until you see signs of life (30–60 minutes; this is not exact and don’t stress about the timing of this!), then return it to the fridge. This keeps the culture fed and prevents acidity from building up too aggressively over time. It also prevents you from having to feed it multiple times when you’re ready to bake with it. Feed it once a week or so, and future you will thank you when you get that craving for fresh bread. Another thing to keep in mind is that I see a lot of people taking a portion of their fridge starter and feeding only that, leaving the "mother" in the fridge, never to be refreshed. I urge you to always take the whole thing out, feed whatever portion you want, and put what’s left of the fed portion back in the fridge. Don’t just leave some starter unfed in the fridge indefinitely. At some point it will weaken enough to mess up your bakes.
When you’re ready to bake, your pre-bake feed determines your whole schedule. You have two good options:
Option A — Morning feed, bake in the afternoon (1:1:1): Pull your starter from the fridge in the morning. Discard down to ⅓ of what you will need for baking and feed at a 1:1:1 ratio with warm water. Because the ratio is equal and you’re using warm water, this starter will peak in roughly 4–6 hours. Mix your dough in the early afternoon when it’s domed, bubbly, and at its best. If you want to bake with it as soon as possible, keep it in a warm spot as well.
Option B — Evening feed, morning mix (1:4:4): Feed your starter the night before you want to bake. Discard to 5–10g and feed at 1:4:4 (1 part starter, 4 parts flour, 4 parts water). The higher flour-to-starter ratio means there’s more food to work through, which slows fermentation and shifts the peak to early morning rather than the middle of the night. Wake up, and your starter is right there waiting for you, ready to mix immediately. If your starter has fallen by the time you wake up, try a 1:5:5 next time or put it in a cooler spot overnight. If it isn’t quite ready, use a 1:3:3 or put it in a warmer spot. You will need to experiment a bit to figure out what works for you.
The choice is really just about when you like to bake. The 1:1:1 morning feed works if afternoons are your time. The 1:4:4 evening feed is for the baker who wants to mix dough first thing in the morning.

Sometimes things drift. Maybe your fridge starter went a few too many weeks between feeds. Maybe your kitchen heated up and you missed the peak a few too many times. Whatever the reason, the result is the same: flat loaves, dense crumb, a sharp acetone smell, and a starter that takes ages to rise and then barely does.
This is a starter that has gone too acidic. Too much acetic acid, not enough yeast activity.
The fix is peak-to-peak feeding: you feed at peak, and feed again at peak, never letting the starter fall and sit in an acidic state. Each feed dilutes accumulated acid and gives the healthy organisms a fresh round of food before the environment has a chance to stress them. The key is not skipping a step. An unfed, deflated starter sitting at room temperature is building acidity by the hour.
During the day: two 1:1:1 feeds with warm water. Use warm water (85–90°F) to push fermentation along efficiently. Feed at 1:1:1 in the morning. Watch for when it stops rising: full rise, domed top, bubbles throughout, clean smell. The moment it peaks, feed again at 1:1:1. Don’t let it fall. Watch again.
Before bed: switch to 1:4:4. You cannot watch your starter overnight. If you feed at 1:1:1 before bed, it will peak around 2am and then sit, deflate, and re-acidify, and that’s the exact condition you’re trying to reverse. Instead, switch to 1:4:4 before you go to sleep. The higher flour ratio slows everything down, shifting the peak to early morning so you wake up to a starter that’s right at its best, not one that already crashed.
Do this for 2–3 days and your starter will come back. You’ll know it’s reset when it rises predictably, more than doubles, smells clean and pleasantly sour, and holds its peak for a good window before beginning to fall. I can’t tell you how many feeds it’ll take to get your starter back in balance. It really depends on how long it was in the fridge and how healthy it was before it went in.
A few notes for the reset period: use your jar marker every single feed so you can track the rise accurately. Keep the amount small, 5–10 grams, so you don’t waste a lot of flour while balancing your starter. Be consistent. An acidic starter didn’t happen overnight, and neither does the fix.
If you bake most days and want your starter ready to go at any time (and you’re nerdy and very consistent with your feeding and bakes): counter method. If you bake on weekends and want a low-maintenance routine that fits into real life: fridge method. If your starter smells sharp, your dough is degrading too quickly, or your loaves are suddenly flat: reset it with a few days of peak-to-peak feeds before you lose faith in it.
Bread baking is supposed to fill your cup. The best maintenance method is the one you’ll actually follow. Learn the rhythms of your starter: how it behaves in your kitchen, in your season, with your flour, and it will become one of the most reliable tools you have. There is no "one right way" because the moment you feel stressed about baking, it’s no longer fun and fulfilling, and I will never encourage you to do something that stresses you out.
The claim that a starter is "never the same" after refrigeration has real science behind it, but the drama is overblown. A sourdough starter is a living ecosystem of wild yeasts and lactic acid bacteria (LAB), and these organisms don’t handle cold equally. LAB (the microbes responsible for tang and flavor complexity) are gradually disadvantaged by typical fridge temperatures, while yeasts soldier on. The result over time can be bread that rises well but tastes blander. The core culture almost never actually dies from refrigeration, and even starters left in the fridge unfed for months can be revived with a few room-temperature feedings. But repeated cold cycles can cause slow microbial drift, with cold-tolerant strains quietly outcompeting more temperature-sensitive ones. That’s the real phenomenon behind the "it changed" complaints. For casual weekly bakers, the fridge is perfectly fine. For flavor obsessives, keeping a starter at room temperature or in a dedicated warmer mini-fridge will better preserve its full character. Again, you have to figure out what works for you and do that. Daily maintenance feeds are not possible for the majority of bakers. The biggest thing to take away from this, in my opinion, is to feed your fridge starter once a week or so, even if you aren’t baking.
.png)
